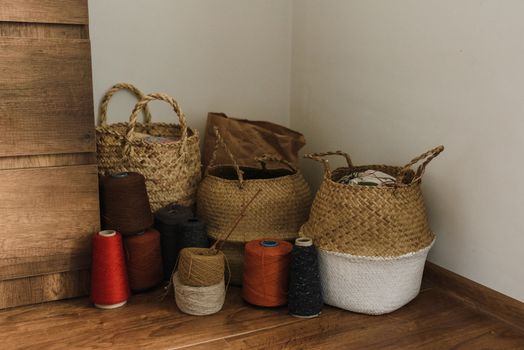
Creating a decorative basket for your home is a rewarding DIY project that combines creativity, functionality, and a sense of accomplishment. Unlike traditional basketry, which often focuses on cultural techniques or heritage styles, this guide is designed to help you craft a personalized, decorative basket using accessible materials and modern methods. Whether you’re looking to organize your living space, add a touch of handmade charm, or create a unique gift, making your own decorative basket is both fun and practical.
The Appeal of DIY Decorative Baskets
Decorative baskets have become a staple in home décor for their versatility and aesthetic appeal. According to a 2023 survey by the Home Décor Association, 67% of homeowners use baskets for both storage and decoration. Unlike factory-made baskets, DIY versions allow for complete customization—think unique color palettes, shapes, and textures that perfectly match your home style.
Handmade baskets can serve multiple purposes: storing blankets in the living room, organizing toiletries in the bathroom, displaying fruit in the kitchen, or simply acting as a statement piece on a shelf. Furthermore, making your own basket is an eco-friendly choice, especially when upcycling materials like old T-shirts, fabric scraps, or even paper.
Choosing the Right Materials for Your Decorative Basket
The choice of materials significantly impacts the look and durability of your basket. While traditional baskets are often woven from reeds or willow, modern DIY baskets can be created from a wide range of materials, many of which you may already have at home.
Common materials for DIY decorative baskets include:
- Cotton rope: Soft, flexible, and easy to work with, cotton rope is a favorite for modern, minimalist baskets. - Fabric strips: Old T-shirts, bedsheets, or leftover fabric can be cut into strips for a colorful, textured look. - Jute or sisal twine: Natural fibers like jute or sisal offer a rustic, earthy appearance. - Paper: Rolled newspaper or magazine pages can be surprisingly sturdy when woven tightly. - Yarn: Thick, chunky yarns create cozy, plush baskets, while thinner yarns allow for finer detail.Each material has its pros and cons. For example, cotton rope is sturdy but can be pricier, while fabric strips are economical and eco-friendly but may require more time to prepare. Consider the intended use of your basket—will it hold heavy items, or serve as a lightweight decorative piece? This decision will help you select the best material.
| Material | Appearance | Durability | Cost (approx.) | Best Use |
|---|---|---|---|---|
| Cotton Rope | Sleek, modern | High | $8-15 (for 50ft) | Storage, décor |
| Fabric Strips | Colorful, textured | Medium | Low (upcycled) | Decorative, lightweight storage |
| Jute/Sisal | Rustic, natural | High | $5-10 (for 50ft) | Planters, rustic décor |
| Paper | Varied, upcycled | Medium | Very low | Decorative, light items |
| Yarn | Soft, cozy | Medium | $3-8 (per skein) | Kids’ rooms, decorative |
Step-by-Step Guide: How to Make a Decorative Rope Basket
For this tutorial, let’s focus on one of the most popular and beginner-friendly techniques: the coiled rope basket. This method requires minimal weaving skill and only a handful of supplies.
Materials needed: - 50 feet of 3/8" cotton rope (for a medium basket) - Hot glue gun and glue sticks - Scissors - Optional: fabric dye or acrylic paint, decorative trimStep 1: Start the coil Begin by tightly coiling one end of the rope into a flat spiral about 2-3 inches wide. Secure each turn with a dot of hot glue, pressing the rope together as you go.
Step 2: Build the base Continue coiling and gluing until the base reaches the desired diameter—typically 8-10 inches for a medium basket. This will be the bottom of your basket.
Step 3: Form the sides Once the base is complete, begin stacking the rope on top of the outer edge, gradually angling the rope upward. Continue gluing and pressing as you coil upward, creating the vertical sides.
Step 4: Finish the rim When the basket reaches your preferred height (usually 6-8 inches), cut the rope and glue the end neatly against the inside or outside of the rim. For added flair, wrap the rim with colored yarn, fabric, or ribbon.
Step 5: Decorate Personalize your basket with fabric paint, tassels, or sewn-on patches. You can dye the rope before starting for an ombré effect, or use contrasting glue (like gold or glitter) for extra sparkle.
This method is quick—many crafters complete a medium basket in under two hours. Plus, the technique is easily adapted: use colored rope for a modern look or natural rope for a farmhouse vibe.
Creative Basket Shapes and Their Uses
One of the joys of DIY basket-making is the freedom to experiment with shapes beyond the classic round basket. Here are some popular alternatives and their practical uses:
Oval Baskets Perfect for table centerpieces or serving bread, oval baskets offer a more elongated profile that fits well on narrow surfaces.
Rectangular Baskets Great for shelf organization, rectangular baskets can be customized to fit drawers or cubbies. They’re especially handy for storing books, remote controls, or toiletries.
Hanging Baskets By adding sturdy handles or loops, you can create baskets designed to hang on hooks or doorknobs—ideal for storing keys, mail, or even small potted plants.
Nested Sets Making baskets in graduated sizes allows them to nest together for storage or stack on display. According to a survey by Home Goods Weekly, nested baskets are among the top three most-purchased decorative storage items in 2023.
Geometric Baskets Experiment with hexagons, triangles, or asymmetrical shapes for a modern, artistic touch. These make eye-catching decorative pieces or unique gift containers.
Finishing Touches: Customizing Your Basket
The finishing touches can transform a simple basket into a statement piece. Here are several ways to add personality and polish:
- Paint or Dye: Use fabric-safe dye for rope or fabric baskets, or acrylic paint for paper or jute. Try color blocking or stenciling for bold patterns. - Handles: Attach leather strips, braided rope, or even thick ribbon for sturdy and stylish handles. - Lining: Sew a fabric liner to protect delicate items or add a pop of color. - Embellishments: Tassels, pom-poms, beads, or lace trim can add whimsy and texture. - Labels: Chalkboard tags or embroidered patches help keep baskets organized, especially in kitchens or playrooms.These details not only enhance the basket’s appearance but also increase its functionality. For example, a lined basket is perfect for storing produce, while a handle makes it easier to carry supplies from room to room.
Eco-Friendly and Upcycled Basket Ideas
DIY baskets are a great way to reduce waste and promote sustainable living. Here are some eco-friendly ideas for upcycling household items:
T-Shirt Yarn Baskets Cut old T-shirts into long strips to make "yarn." This material is stretchy, colorful, and machine washable—ideal for baskets in kids’ rooms or bathrooms.
Magazine or Newspaper Baskets Roll pages into tight tubes, then weave them together for a surprisingly sturdy and colorful basket. A 2022 study by Green Crafting found that repurposed paper baskets can hold up to 10 pounds of weight.
Plastic Bag Baskets Plarn (plastic yarn) is made by cutting plastic shopping bags into strips and tying them together. The result is a waterproof, durable basket for outdoor or garage use.
By repurposing materials you’d otherwise throw away, you contribute to a more sustainable lifestyle while creating one-of-a-kind décor.
Displaying and Using Your Decorative Baskets at Home
Once your basket is complete, the possibilities for display and use are endless. Here are some tips for integrating your creations into your living space:
- Entryway Organization: Use a decorative basket to catch keys, sunglasses, or mail. - Bathroom Storage: Roll towels and arrange them in a rope basket for a spa-like effect. - Living Room Décor: Fill a basket with cozy throws or magazines for easy access. - Plant Holders: Place potted plants inside a lined basket for a boho-chic planter. - Table Centerpieces: Arrange seasonal fruit or decorative objects in a shallow basket for instant style.The beauty of a DIY decorative basket lies in its adaptability—it can move from room to room as your needs (and décor tastes) change.
Final Thoughts on Making a Decorative Basket for Your Home
Creating your own decorative basket is more than just a craft project; it’s a personalized way to enhance your home and express your style. With a range of materials, shapes, and finishing touches to choose from, the only limit is your imagination. As more people seek sustainable, handmade solutions for their homes, DIY baskets stand out for their blend of beauty, utility, and eco-friendliness.
Whether you’re a seasoned crafter or a first-time maker, this project is accessible, affordable, and satisfying. You’ll not only gain a useful new item for your home, but also the pride that comes with saying, “I made that myself.”